Today’s Guest Blog is from Ade Wilson of McFade Photography, he’s sharing tips on how to take great photos on your phone:
Taking photos on a phone has never been easier, you just point and shoot and the phone gets it right most of the time.
But how do you increase your “hit rate” and make your photos look better?
Well, most phones now have these three things which help you compose a shot, get the right thing in focus and get the brightness right.
1 – The Grid
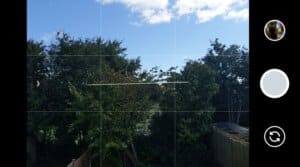
All the grid does is put noughts and crosses lines on your screen – you can see from my phone screenshot that there are two vertical and two horizontal lines.
You can switch this on in the camera settings on iPhone or in the phone app settings on Android.
Whenever you take a photograph from now on, always put the most important thing along one of the lines –
- if it is a portrait then put the face on the left or right line, rather than in the middle.
- if you’re taking a landscape, you would put the horizon on either the top line or the bottom line, not in the middle.
- if you are photographing a cup of coffee, put the cup on the left or right line, not in the middle.
You see the pattern!
It is called the rule of thirds and has been around since well before Roman times.
2 – Tap to Focus
When you are taking a picture and have put your subject on one of the lines (see above), just before you click to take the photograph, tap the subject on your phone screen.
This actually does two things
- The camera focuses on the thing you tap so that will be sharp
- The camera also measures how bright the thing you tap is. Then it adjusts the brightness to what it thinks is correct.
So, this is definitely worth doing and works with every camera I’ve ever seen.
3 – Exposure Compensation.
This last one is more of a fine-tuning step, than essential.
Do you ever find that you take a photo and it was too bright or too dark?
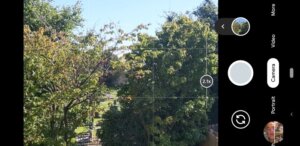
As good as cameras are, they sometimes get things wrong, so they have added a slider at the top of the screen (with a sun on it) which you can slide left or right. If you can’t see it just tap on your screen and pop it pops.
This will make the photo brighter, or dark, depending which way you slide.
The posh name for this is “exposure compensation” but you could have easily call it the “brightness slider”.
Putting it all together…
So, whenever you’re taking a photo with your phone, try following this recipe
- Hold your phone steadily and put your subject on one of the gridlines
- Now tap on the subject so the phone Focuses on it
- Finally, if your subject is too light or dark, have a quick slide with the brightness slider to see if you can improve it
- Say something really silly if it’s a person to get a smile, and tap the shutter button (or press the “volume down” switch on an Android phone)
That may seem a lot of a faff, but what reputation makes it second nature so keep going and your photos will look better as a result.
For more information, connect with Ade on LinkedIn or visit his website


